Use forums to organize your discussion topics into categories. Your course can have multiple forums and topics, but you must create a forum before you can create a topic since all topics belong to forums.
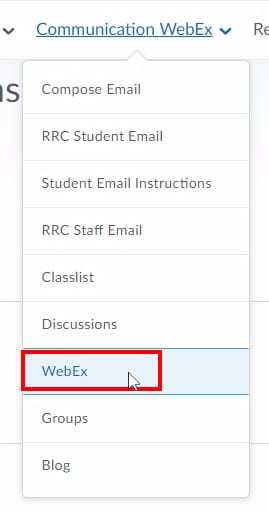
- On the navbar, click Communication and choose Discussions.
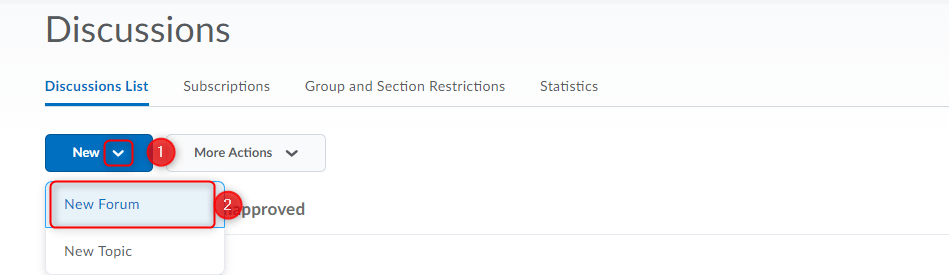
- On the Discussions List page, from the New (1) button drop-down menu, click New Forum (2).
- Enter a title (1) for your new forum.
- Enter a description (2) for your new forum. The Description can be used to give any extra information you may have about this forum or the topics within. You can include rules of conduct, how and if this forum will be assessed, or general information about the forum.
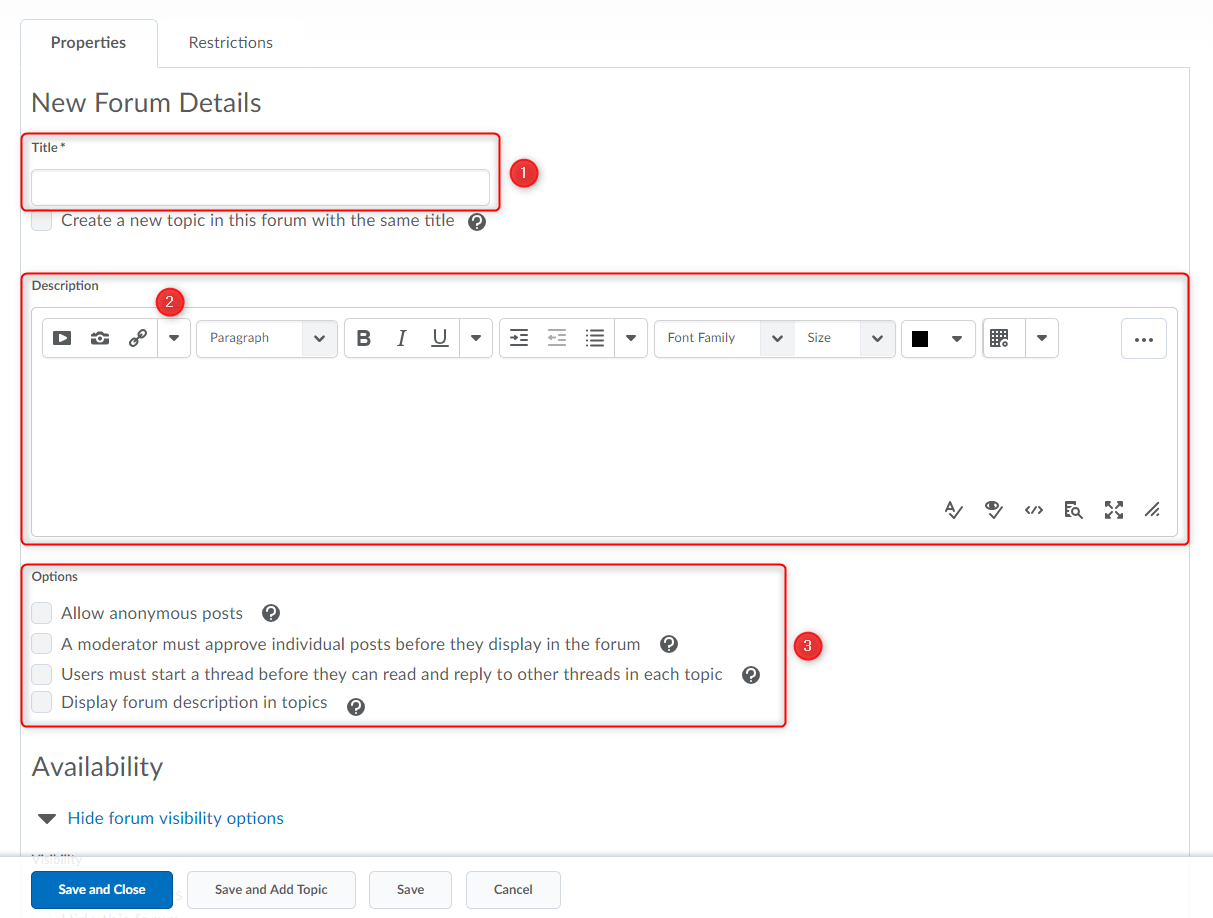
- In the Options (3) section, select any of the following check boxes:
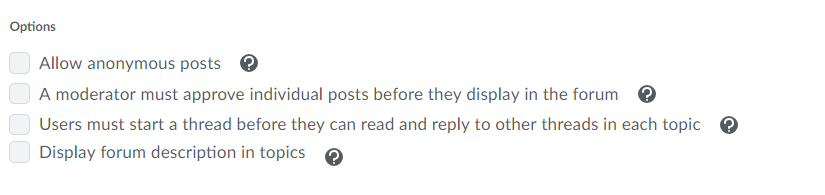
Allow anonymous posts – Selecting this option allows users to post anonymously to topics created within this forum. Anonymous posts display with the author “Anonymous” in the thread.
NOTE: It may be a good idea to also include the option “A moderator must approve individual posts before they display in the forum” when using anonymous posts.
A moderator must approve individual posts before they display in the forum – Selecting this option will require a moderator to approve posts to topics created within this forum before they display to users.
Users must start a thread before they can read and reply to other threads in each topic – Selecting this option will require a user to start a new thread in a topic before viewing or replying to other threads in that topic in the forum. If this forum requires post approval, users will not be able to view or reply to other threads until their thread is approved. This option prevents students from being influenced by each other’s initial posts. It also is a great way to spearhead engagement as it forces each student to initiate a thread rather than simply replying to other student’s initial posts.
Display forum descriptions in topics – To provide instructors the option to display a discussion forum description within a discussion topic description.
- Availability – Visibility – The options under visibility control if and when the student can view the forum and all the topics and threads below it. Often instructors will allow a forum to always be visible and control access with the “Locking Options”.
- Locking Options – Locking a forum will maintain the visibility of the forum, topics and threads, but remove access from the students to create new posts and replies. This can be used to archive a past forum maintaining visibility, or to allow a preview of an upcoming forum.
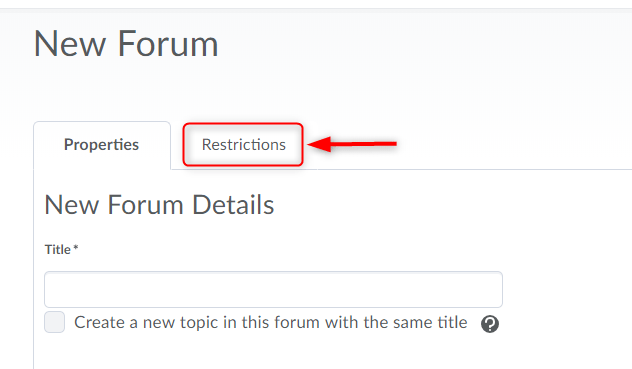
- Restrictions (Tab near the top of screen) – Here you can apply release conditions, or restrict the forum to a group when you are using the groups tool. NOTE: You can create forums from the groups tool when you are setting up groups.
- Click Save and Close.
Before you start to transfer your LEARN grades to Colleague first check to ensure your LEARN gradebook is setup correctly, that student grades make sense, and that you have transferred the final calculated grades to the Final Adjusted Grades column in LEARN. Click here for instructions to transfer final calculated grades to Final Adjusted Grades.
Note: Student grades do not have to be published to students to transfer them to Colleague.
Instructions:
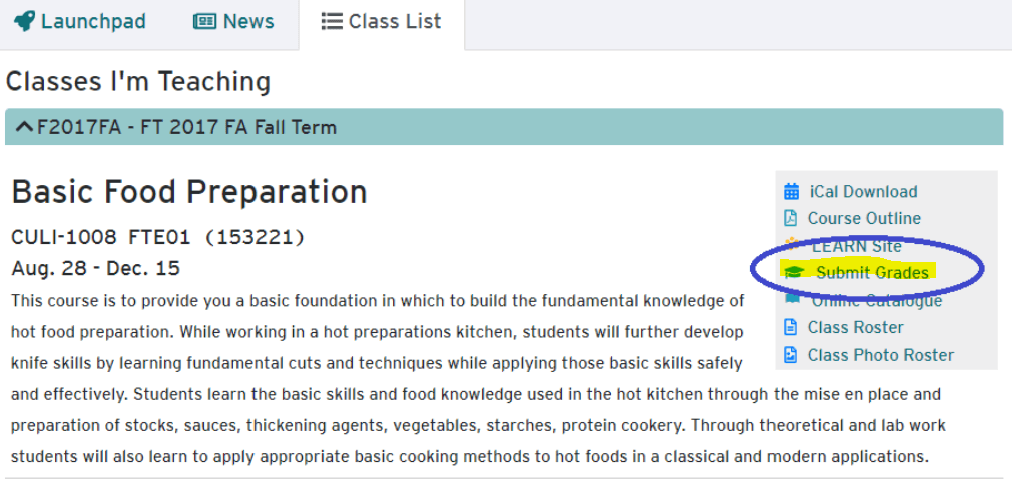
- Go to hub.rrc.ca and open the Class List Click Submit Grades under the course you want to transfer grades for. (Please note that Crosslisted courses for may require the child sections grades to be transferred via the original Webadvisor process. This is a temporary issue which won’t affect future deliveries.)
- You should now see a list of students, their grade in the LEARN gradebook, and a suggested grade based on their LEARN grade. If the Suggested Grade already exists and has no drop-down option, this means that the grade has already been submitted to Colleague and can not be changed.

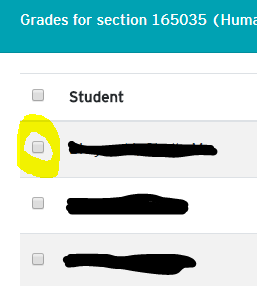
- Select the checkbox beside the student’s name you wish to submit grades for, choose a grade from the drop-down list, or leave it as the default suggested value.If you select DNW or INC for a grade, you must set an expiry date for this temporary grade.
 To select all students in this section, check the box in the heading beside Student.
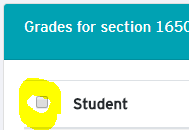
- Once you have made all the changes you want, click Submit Grades. The number to the right of Submit Grades represents the number of students who will have grades submitted. Submitting grades can take some time.

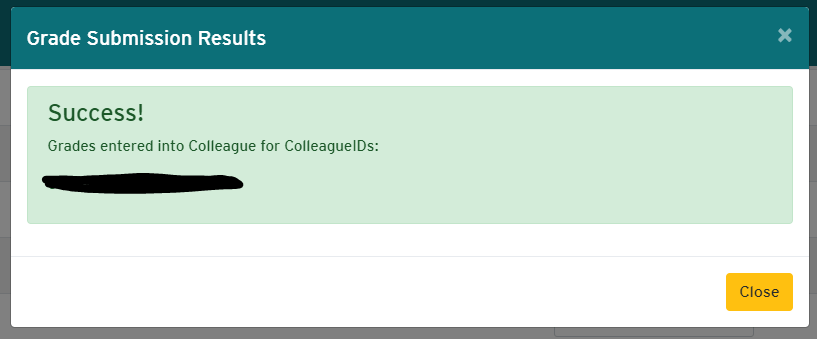
- Once your grades have been submitted, you should see a green success message and on closing the message, you will return to the previous screen. From here you can continue to submit grades as needed.
If changes need to be made to grades after submitting please contact your applicable Student Records Officer (SRO) through Enrolment Services.
If you encounter any issues with this process, please email LEARN support at learn@rrc.ca.
]]>- A good quality webcam. For meetings between staff, a laptop webcam will be fine but not ideal.
- A good quality headset that includes headphones and a microphone.
- A decent internet connection. At least a 3G (2Mbps+) internet connection is required. The college network is ideal.
- A quiet, well lit room.
- Login to WebEx by going to http://redrivercollege.webex.com and using your RRC credentials. This will create your account.
- Download the WebEx Desktop Client. Run the client to ensure that it works smoothly.
Download the WebEx Desktop client for Windows.
Download the WebEx Desktop Client for Mac.
This will take you to the LEARN WebEx integration where you can view and schedule classes.
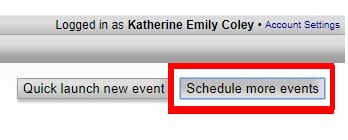
Click “Schedule More Events”
To Schedule events in WebEx click on “Schedule more events” in the top right corner of the page.
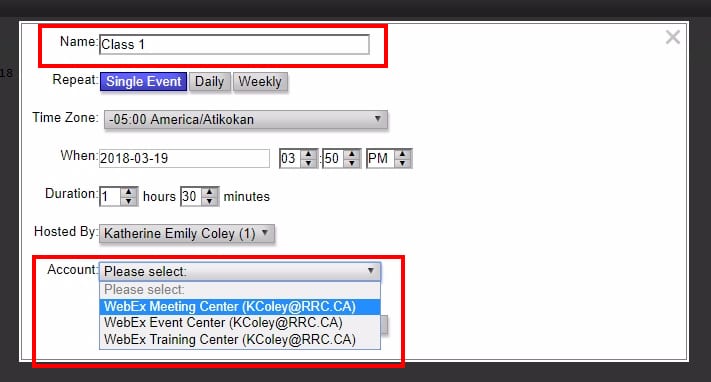
Enter Event Details
Enter your class/event details including the name of the event, the time and duration of the event and the WebEx account you want to use. Most people will use the WebEx Meeting Center account.
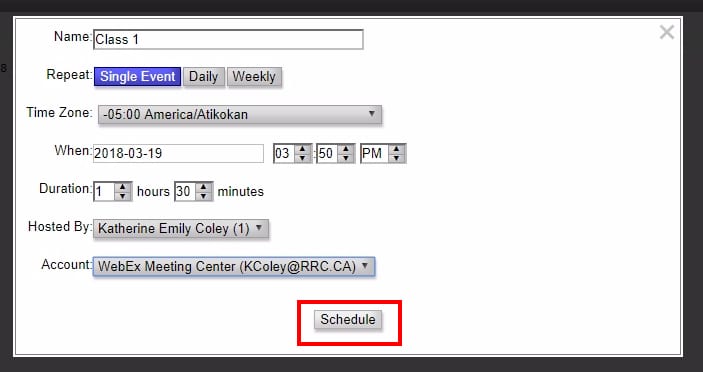
Click “Schedule”
This will schedule your event so that students can see it upcoming.
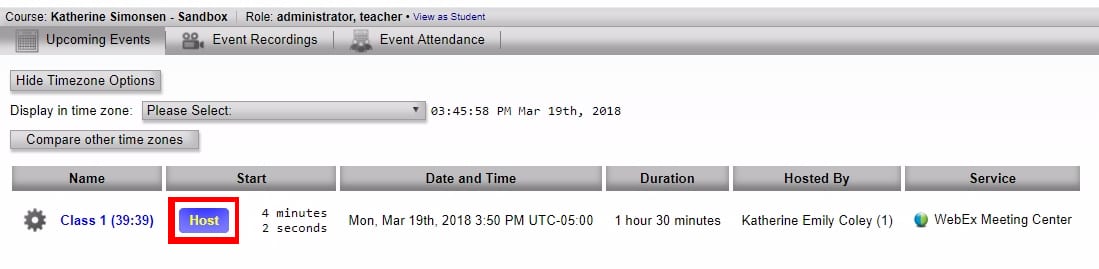
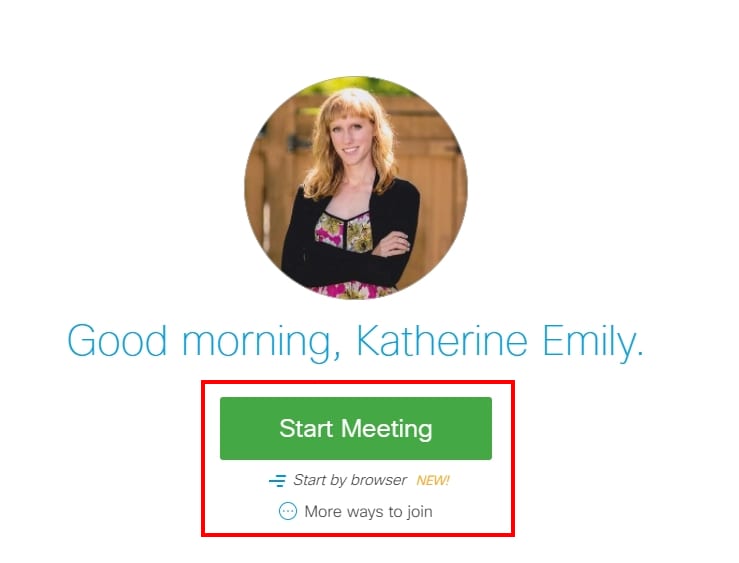
Click “Host” to start your event
When the event time comes up, go to WebEx in your LEARN course and click “Host” to begin your meeting.
Students can now “Join” your event
Students can join your event/class by going to the WebEx page in their LEARN course and clicking “Join” next to the appropriate event.

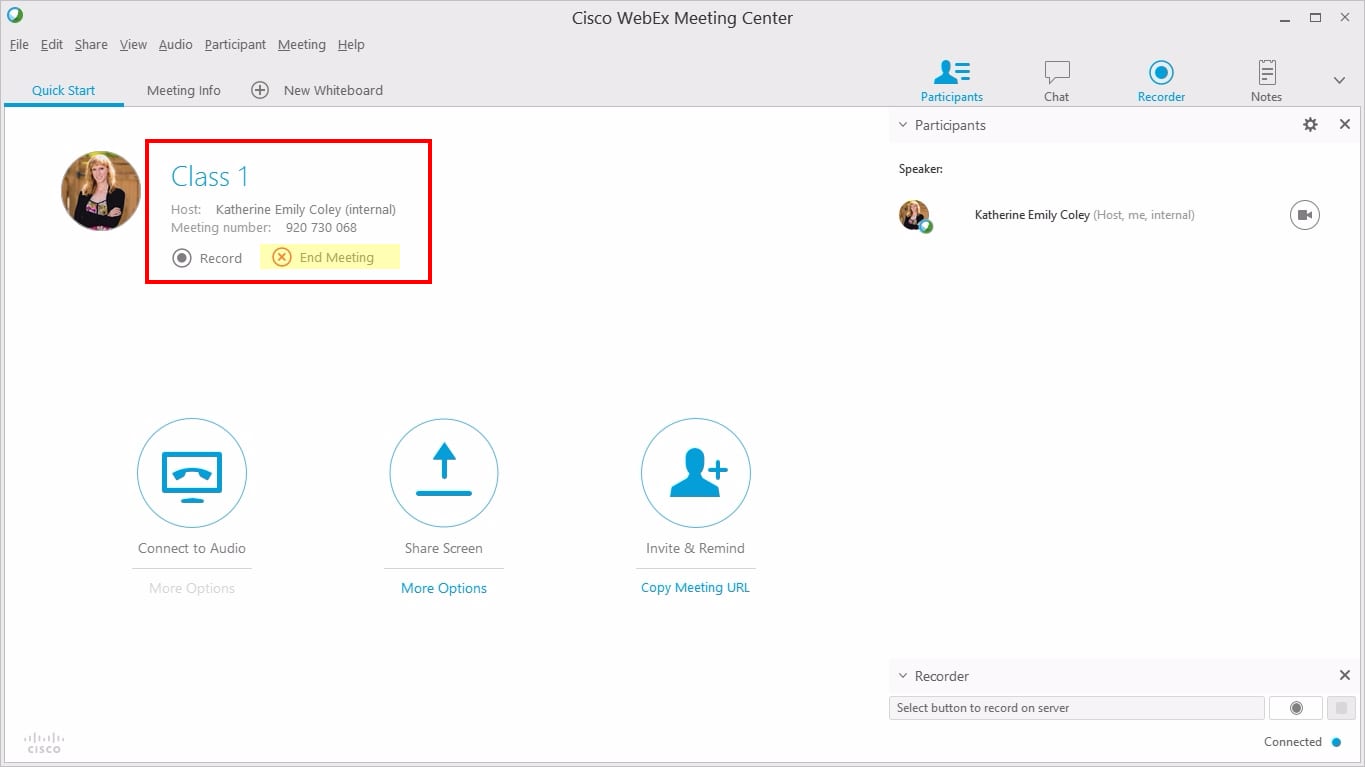
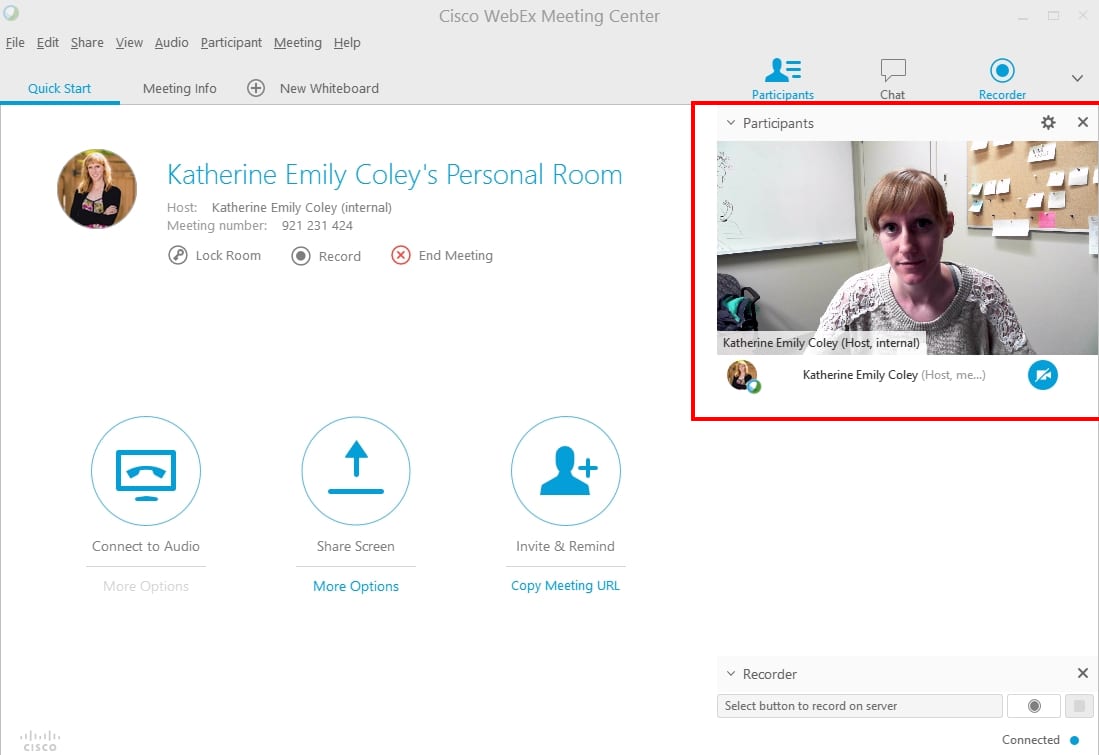
Your WebEx Desktop Client will now open
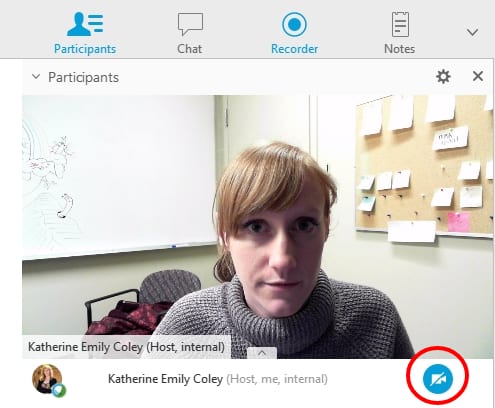
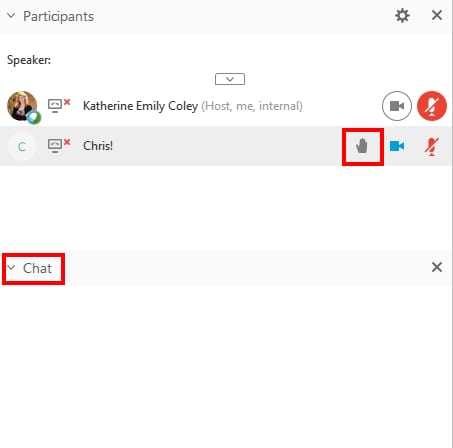
You can see a list of class participants and begin your event as usual.
Close the window or click “End Meeting” when you want to end your class/event.
Viewing Recordings
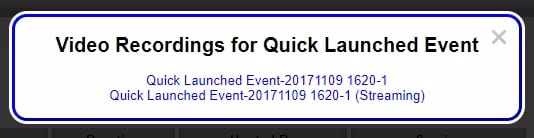
Go to the WebEx link in your LEARN course and click “Event Recordings“. You can now view the recording of any past event by clicking on “View Recordings“.

The first link is the link to download the recording. The second link is the link to stream the recording online. Students have access to these recordings as well as the instructor.
]]>
- Have a detailed lesson plan.
- Keep lessons short and on topic.
- Have all PowerPoints and files pre-loaded into WebEx.
- Load files into LEARN so students can prepare for the class.
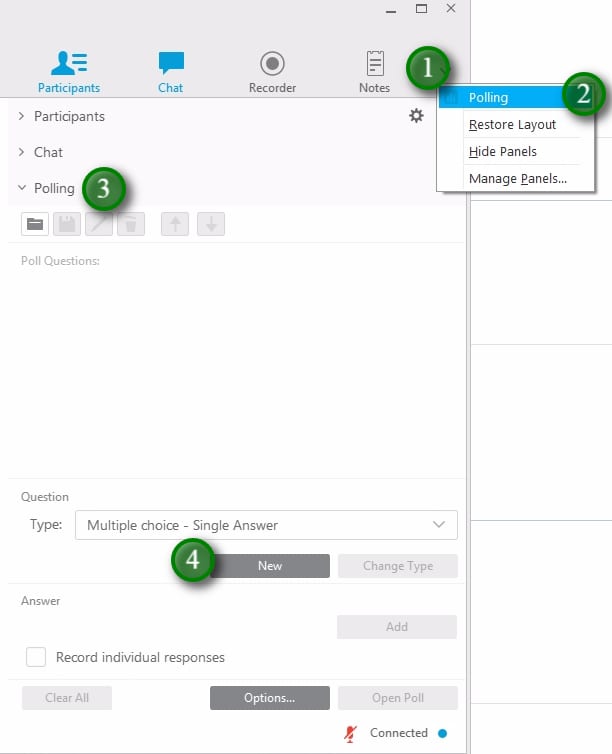
- Prepare WebEx Poll questions and discussion topics.
- Ensure you follow the technical requirements.
- Do a practice online session with your students before a formal class.
2. Engage Your Audience
- Use your webcam to show your face.
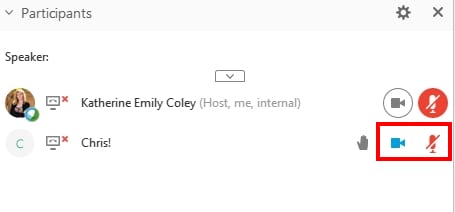
- Choose when to allow students access to use their microphone or webcam and allow students to share their screens.
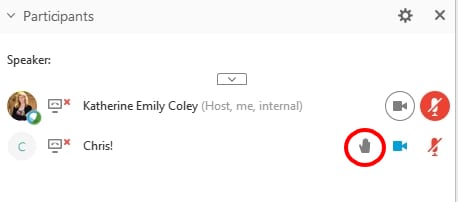
- Pay attention to when students “raise their hand”, say their name, and address them in chat or using a microphone.
- Use polling and interactive whiteboards.
3. Multitask
- Be aware of the chat and students raising their hands.
- Mute and un-mute students appropriately.
4. Have a Backup Plan
Let’s face it, sometimes technology fails. It’s safest to always have a backup plan for online classes.
- Record the session for students that may miss it for technical reasons.
- Post all materials, whiteboards, images, files, etc. in LEARN after the session.
For more detailed information on teaching online, click here to download the eLearning Guild’s Handbook on Synchronous Learning (PDF).
]]>There are two ways to ensure your content is accessible: conform to the Web Content Accessibility Guidelines (WCAG) and involve people with disabilities in evaluating and testing your content.
Conforming to WCAG 2.0
The Web Content Accessibility Guidelines (WCAG 2.0) are standards developed by the W3C to assist in the development of accessible digital content. There are a few ways to ensure conformance to WCAG including documentation, checklists, and testing tools.
WCAG 2.0 Documentation
The W3C provides documentation on how to conform to WCAG 2.0 but it is quite extensive and can be overwhelming for beginners.
WCAG 2.0 Checklist
WebAim provides a WCAG 2.0 checklist based on their interpretation of WCAG’s guidelines and success criteria that is easy to follow and a good place to start to learn about what is required to conform to the standard.
Machine Testing using Evaluation Tools
There are many tools that can provide automated accessibility evaluations or audits. These tools can verify conformance to WCAG 2.0 and the level of conformance (A-AAA). These tools are required to assist content developers and designers in identifying errors and providing suggestions for fixes, but they cannot tell you if your web content is actually accessible.
LEARN Accessibility Checker
LEARN has an accessibility checker built in to the HTML Editor that will identify some of the WCAG 2.0 guidelines.
How to use LEARN’s Accessibility Checker
WAVE: Web Accessibility Evaluation Tool
WebAIM’s WAVE is the easiest to use evaluation tool. WAVE is made available as a Chrome extension, a Firefox add-on or online. The online version can be used to evaluate web pages and the browser plugins can be used to evaluate web pages and LEARN content.
Chrome Extensions
- Accessibility Developer Tools
- WCAG Accessibility Audit Developer UI
- Axe Accessibility
- Siteimprove Accessibility Checker
FireFox Add-ons
Web Accessibility Evaluation Tools List
The W3C provides an extensive list of accessibility evaluation tools.
Human Testing
While WCAG conformance can go along way to assisting with making accessible content and evaluation tools can identify errors only humans can really determine whether web content is accessible. To ensure your content is accessible it is recommended that you enlist people with disabilities to test your content. People with disabilities bring their experiences and assistive technologies they use to navigate web content.
Recommended reading
Why accessibility testing with real users is so important
Tips For Conducting Usability Studies With Participants With Disabilities
]]>Why Have Virtual Office Hours?
Virtual office hours allow you to meet with students without anyone having to travel. This is ideal for online or blended courses but can also be used for face to face classes to give students another option to get help with their classes.
Virtual office hours can be used for tutoring, information sessions, or quick check-ins with students.
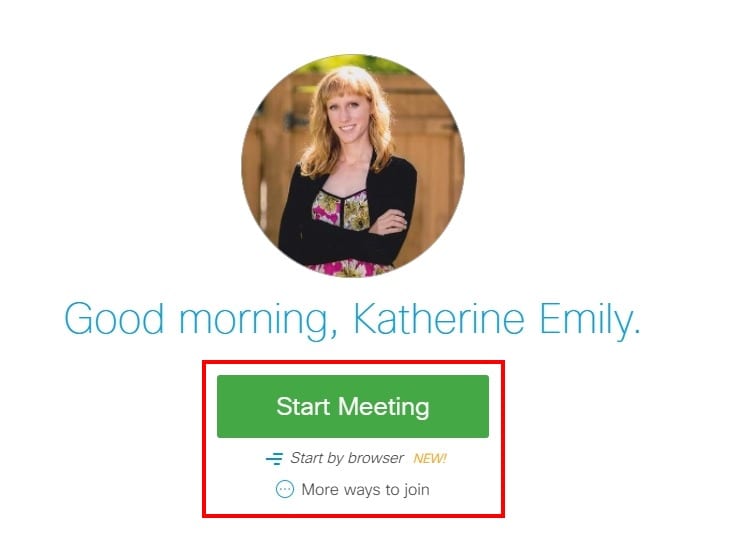
Your Own Personal Meeting Room
With WebEx you have your own meeting room where you can start meetings and invite participants at any time. To get started, log in to WebEx (http://redrivercollege.webex.com), go to My WebEx and then click Start Meeting.
Simply link to your own meeting room (http://redrivercollege.webex.com/meet/username) and students can join whenever you are “in” your virtual meeting room.
Use Live Video to Connect
With WebEx you can use a webcam and microphone to easily connect with your students on a more personal level and get problems solved quicker than with email.
For online and blended classrooms, the live video provides a more personalized experience and increases engagement.
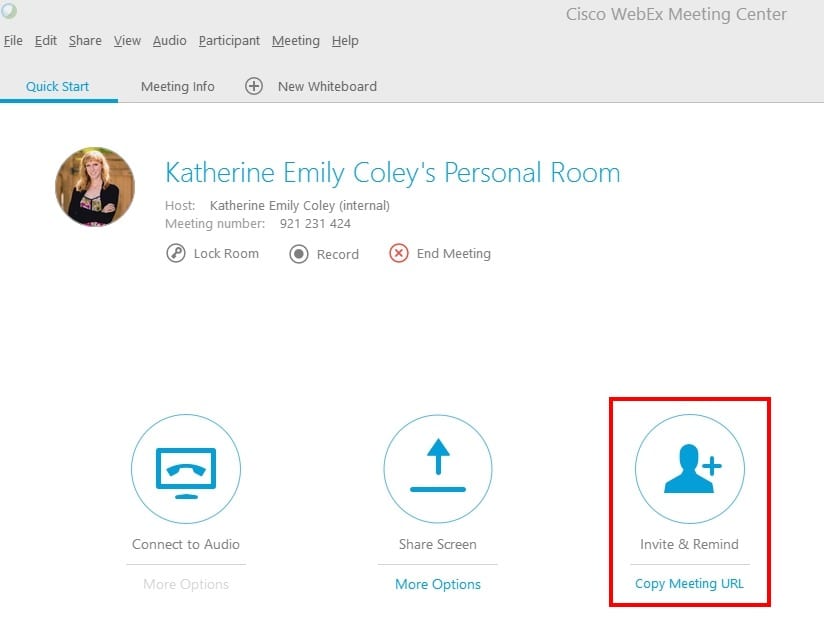
Easily Invite Participants
With WebEx you can easily link to your meeting room or invite participants via email. You can also send reminder emails to participants.
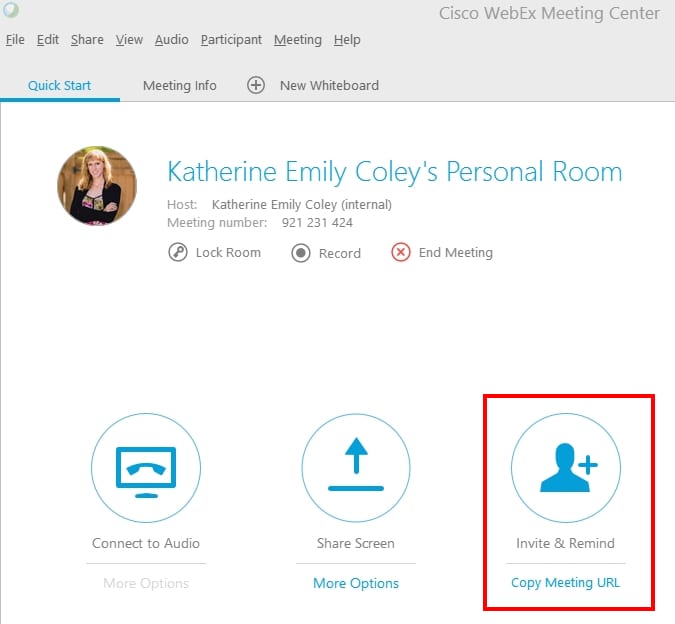
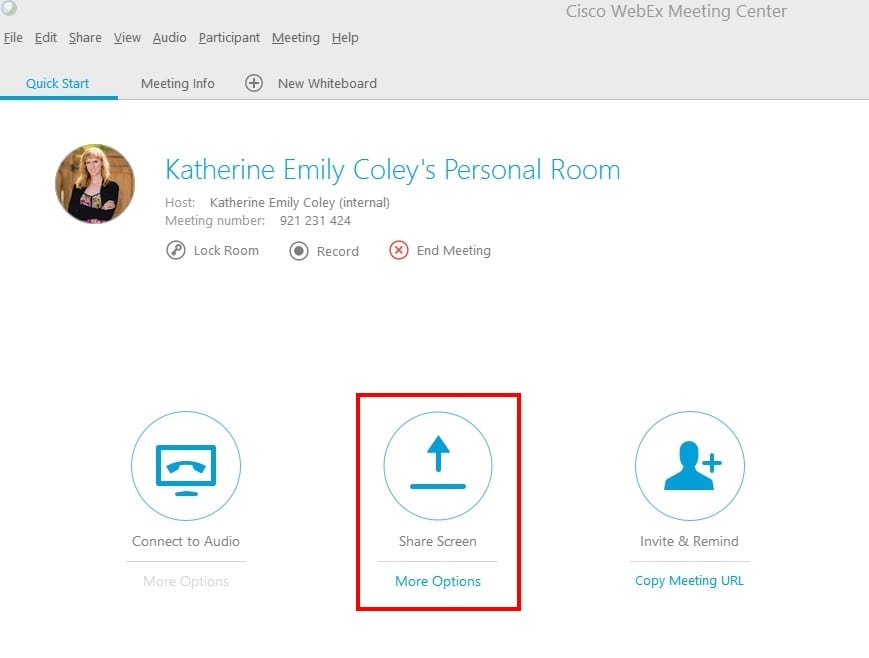
Share Your Screen
Share your screen and allow participants to share their screens with you. Sharing your screen allows you to demonstrate software, give feedback on assignments, and troubleshoot problems students may be having.
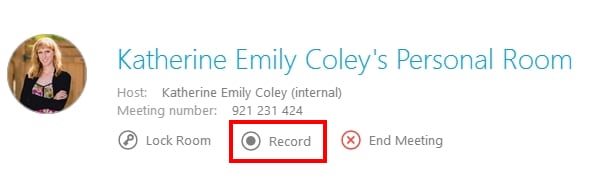
Annotate your demonstrations and record them for later.

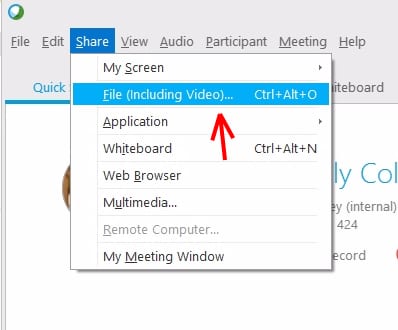
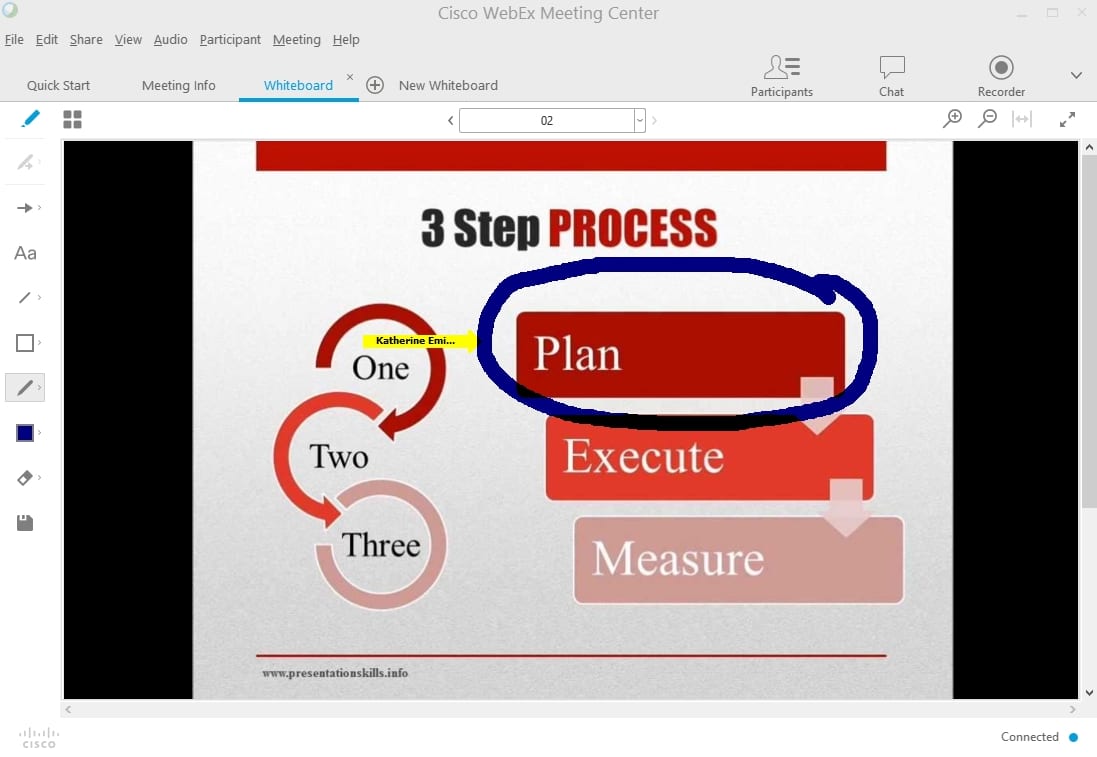
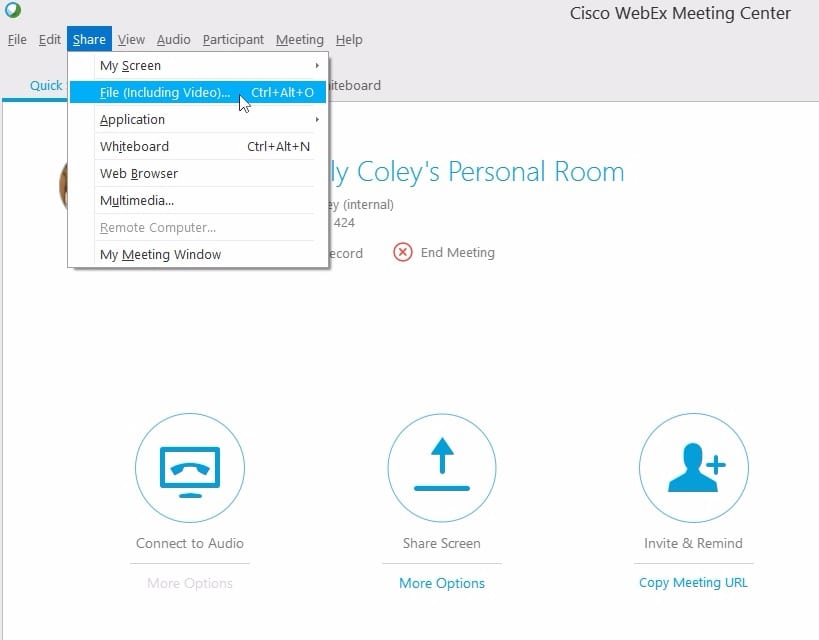
Share Files and Presentations
Quickly share files to students and present PowerPoint files directly within WebEx. Review class material and annotate files for further clarification.
Students can also participate, give them permission to control the presentation, annotate slides, and write on a virtual whiteboard.
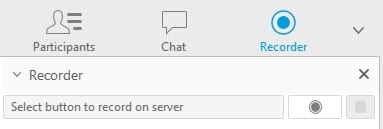
Record for Later
Explaining something multiple times? Record an explanation once and share it with the class.
For more information on scheduling meetings with WebEx, see the Getting Started with Cisco WebEx Meeting Centre Documentation.
]]>You can use WebEx to easily schedule online meetings between co-workers. WebEx runs on almost every device and can support text chat, video conferencing, screen sharing, and audio conferencing.
You can use WebEx to use a shared whiteboard, share files, and show your screen to others for troubleshooting and presentations.
With WebEx, you don’t have to travel for meetings and can conference with many people at once, saving time and money.
Create Meetings Quickly and Easily
With WebEx you have your own personal meeting room (http://redrivercollege.webex.com/meet/username) that you can start any time and can invite anyone to join. No more scheduling meetings and setting up meetings rooms, just start a meeting, invite using email, and go.
Share Your Screen
With WebEx you can share your screen with one click. Perfect for troubleshooting or sharing websites, software, and works in progress.
Share Files
Share files to participants and upload PowerPoint presentations to show within WebEx.
Easily Invite Participants
Invite participants via email or directly within Outlook with the WebEx productivity tools.
For more information on scheduling meetings with WebEx, see the Getting Started with Cisco WebEx Meeting Centre Documentation.
]]>
Inclusive Design is about putting people first. It’s about designing for the needs of people with permanent, temporary, situational, or changing disabilities — all of us really. In this webinar Henny Swan will introduce the 7 principles and how they can be used alongside standards and guidelines, to take products beyond compliance.
Presenter
Henny Swan is an Accessibility Specialist with over 12 years experience in inclusive design. She is a Senior Accessibility User Experience Specialist at The Paciello Group (TPG) and prior to that worked on cross device media player accessibility at the BBC as well as developing BBC Mobile Accessibility Standards and Guidelines.
The webinar
This webinar is relevant to anyone involved in the design and development of web content and digital environments — instructors, designers, developers, and policy makers responsible for Accessibility for Manitobans Act (AMA) activities.
TLTC and eTV are hosting this webinar on Wednesday, February 21 from 10:15-11:30 a.m. in eTV studio B. Register to attend this webinar.
If you are unable to attend this webinar at eTV or prefer to participate on your own you can register online.
For more information contact Jim Hounslow.
]]>A collection of resources to support the 7 Principles of Inclusive Design webinar.
Articles and Blogs
Inclusive Design Principles – Henny Swan, Ian Pouncey, Heydon Pickering, Léonie Watson, The Paciello Group (TPG)
Inclusive Design Principles and how to use them – Henny Swan, The Paciello Group (TPG)
Women in UX: Meet Henny Swan, Advocate for UX Inclusivity – Henny Swan’s tips for creating more inclusive UX designs
If you want the best design, ask strangers to help – Jutta Trevirans, professor and director, Inclusive Design Research Centre (IRDC), OCADU
IHENI – Henny Swan’s blog
Inclusive Design Research Centre (IDRC) – OCADU
Video
An Introduction to Inclusive Design – Microsoft Design
Empathy – Microsoft Design
Inclusive Design Principles – Henny Swan : #ID24 2017 – The principles of Inclusive Design, The Paciello Group (TPG)
Henny Swan – The Velvet Rope – #NUX5 – Accessibility and Inclusive Design, The Paciello Group (TPG)
a11yTO Conference – Henny Swan on the principles of Inclusive Design (starts at 34:33)
Toolkits
Microsoft Inclusive Design: toolkit, activities and resources – Microsoft Design
Inclusive Design Toolkit – University of Cambridge
Inclusive Design – Barclays Bank
Posters
Inclusive Design Principles (compressed zip file) – The Paciello Group (TPG)
Inclusive Design Principles single poster – Barclays Bank
Inclusive Design Principles individual posters – Barclays Bank
On Twitter
@paciellogroup – The Paciello Group (TPG), accessibility testing/evaluation, compliance audits, and training.
@iheni – Henny Swan, accessibility specialist, The Paciello Group (TPG)
@LeonieWatson – Léonie Watson, accessibility engineer, The Paciello Group (TPG)
@idrc_ocadu – Inclusive Design Research Centre (IRDC), OCADU
@JuttaTrevira – Jutta Trevirans, professor and director, Inclusive Design Research Centre (IRDC), OCADU
]]>